How to Create Subtitles for Videos A Simple Guide
Learn how to create subtitles for videos with our simple guide. Discover AI and manual methods to improve accessibility, SEO, and viewer engagement.

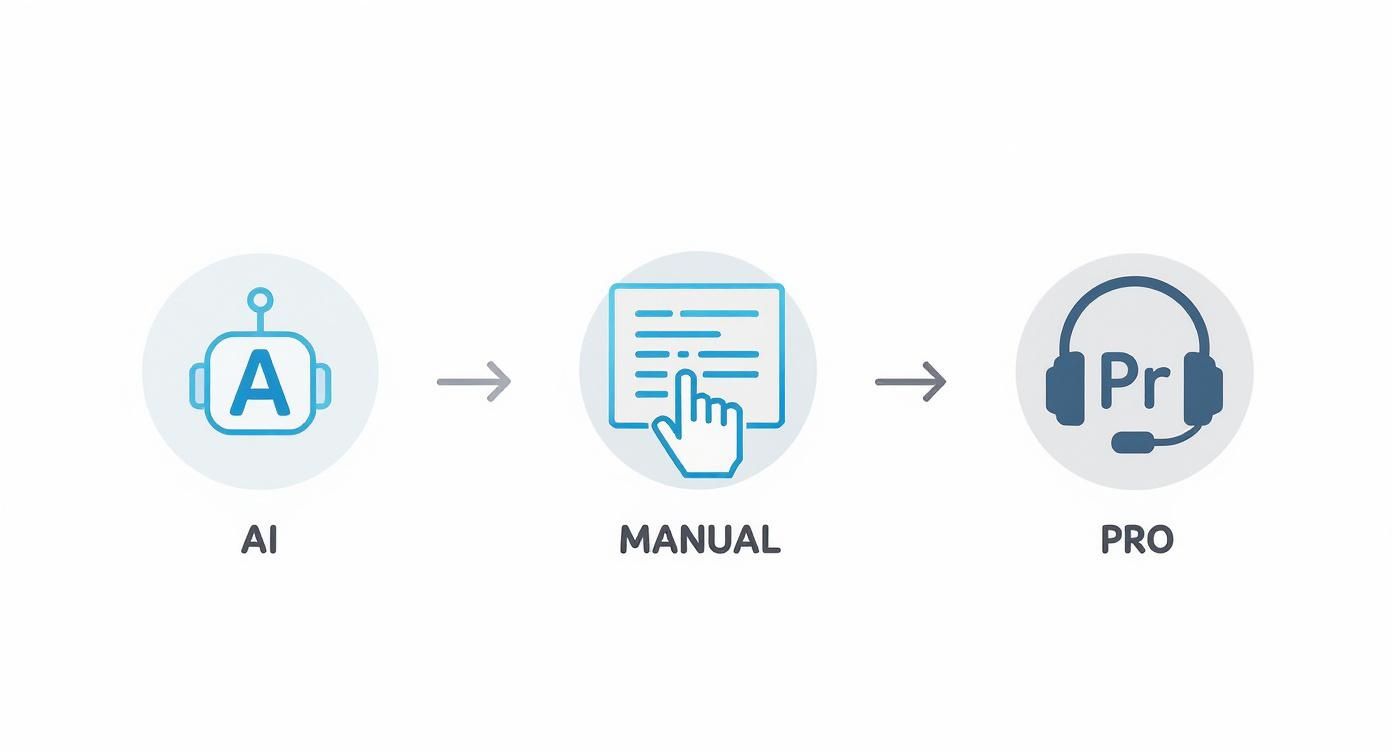
When it comes to creating subtitles for your videos, you really have three main options. You can use an AI transcription tool like Typist to get it done fast, create them by hand for absolute control, or hire a professional service if you need guaranteed accuracy. Honestly, the most popular and efficient method these days is to let an AI do the heavy lifting first, then jump in and make a few quick edits to get it just right.
Why Your Videos Need Subtitles Today
Subtitles aren't just a "nice-to-have" anymore; they're an essential part of any successful video strategy. We live in a world where people watch content everywhere—often with the sound completely off—and subtitles are the only thing ensuring your message actually lands. They’ve moved way beyond foreign films and are now a critical tool for accessibility, engagement, and even getting your content discovered in the first place.
Just think about how you and everyone you know watches video. You might be scrolling through your feed on a quiet train, trying to follow a tutorial in a loud coffee shop, or catching up on content late at night so you don't wake anyone up. In almost every one of these situations, the video is muted. Without subtitles, your hard work is completely lost.
Expanding Your Reach Through Accessibility
At its heart, adding subtitles is about being inclusive. It immediately opens your content up to a much wider audience by tearing down the barriers that would otherwise keep people from watching. And this isn't just about translating for different languages.
The accessibility wins are huge:
- Deaf and Hard of Hearing Viewers: For the millions of people who are deaf or hard of hearing, subtitles and captions are non-negotiable. They are the only way to experience video content. Adding them makes your brand more inclusive and helps you meet accessibility standards.
- Non-Native Speakers: Subtitles are a lifesaver for viewers who aren't fluent in the video's language. They can read along to improve their understanding, making it far easier to digest complex information.
- Learning and Comprehension: You'd be surprised how many people, with perfect hearing, turn on subtitles just to help them focus and retain information. Reading along while listening reinforces the message and boosts concentration.
This isn't a niche feature. The global demand is exploding, with the subtitle market valued at USD 0.317 billion and projected to hit USD 0.76 billion by 2033, largely thanks to streaming services and the sheer volume of online content. You can read more about the subtitle market growth and see just how big this trend has become.
Boosting Engagement and SEO
Beyond just doing the right thing, subtitles give you a serious strategic edge that directly impacts your video's performance. They're a surprisingly powerful tool for both search engine optimization (SEO) and keeping your audience hooked.
By adding a text-based transcript of your video's audio, you give search engines like Google a wealth of keyword-rich content to crawl and index. This makes your video far more discoverable in search results.
Let's say you've made a video on "how to create a sourdough starter." The subtitles will naturally be filled with all the specific terms someone would type into a search bar. That text gives search engines the context they need to understand your video and rank it for those queries, driving more organic traffic your way.
Subtitles also get people to watch for longer. Picture someone scrolling their social feed. When your muted video pops up, the subtitles can grab their attention in the first few seconds, giving them a reason to stop and watch. That increased watch time is a powerful signal to platforms like YouTube and Instagram that your content is valuable, which can lead to them showing it to more people. By making your message clear from the get-go, you create a better experience that keeps viewers engaged.
Choosing the Right Subtitle Creation Method
Never miss a word from lectures or interviews
Record once, transcribe instantly. Search, export, and reference later
Before you even think about generating a subtitle file, you’ve got a big decision to make: how are you going to create it? The path you choose really comes down to what you're working on. You need to weigh things like your budget, how quickly you need it done, and just how perfect the final product has to be.
Let's walk through the three main ways you can tackle this. What works for a quick Instagram Reel is completely different from what a feature film requires, and figuring this out upfront will save you a world of headaches later on.
Using Automated AI Transcription
Honestly, for most people, this is the way to go these days. Tools like Typist have completely changed the game. What used to be a tedious, hours-long chore is now something you can knock out in just a few minutes. You just upload your video, and the AI does the heavy lifting, spitting out a time-coded transcript almost instantly.
This approach is a lifesaver for:
- YouTubers and social media managers who need to get content captioned and posted fast.
- Educators and students who are making course materials or lectures accessible without a big budget.
- Researchers who have hours of interviews to get through and just can't afford to type it all out by hand.
The biggest win here is speed. I'm talking about transcribing an hour-long podcast episode in the time it takes to grab a coffee. While the accuracy of modern AI is fantastic—often hitting over 99%—it's not infallible. It might stumble over weird spellings, thick accents, or super-niche industry slang. You'll almost certainly need to do a quick proofread and clean up a few spots, but that’s still worlds faster than starting with a blank page.
Key Takeaway: AI transcription gives you an incredible head start. It’s the perfect blend of speed and affordability, delivering a solid draft that just needs a quick human polish to be perfect.
Curious how fast it really is? Try Typist free - Get 3 transcripts daily
Creating Subtitles Manually from Scratch
Now, if you've got more time on your hands than money in your pocket, going full-manual is always an option. This is the old-school way: you listen to your video, pause, type, rewind, and repeat. You can do this in any plain text editor or use dedicated subtitle software.
The real grind is adding the timestamps yourself. You have to mark exactly when each line of text should appear on screen and when it should disappear. A single subtitle in a standard SRT file, for instance, looks something like this:
00:01:15,250 --> 00:01:17,600
This is how you format a timestamp.
Getting that right for an entire video is meticulous, slow work. A good rule of thumb is that it takes about 5-10 minutes of your time to manually caption just one minute of video. So, for a standard 10-minute YouTube video, you could easily be looking at an hour or more of focused effort. It’s really only practical for super short clips or creative projects where you want total artistic control over the text.
Hiring a Professional Human Transcription Service
When you absolutely, positively cannot have a single error, it's time to call in the pros. For high-stakes projects, hiring a professional transcription service is the gold standard. These are trained experts who can deliver near-flawless transcripts, handle multiple speakers with ease, and nail complex jargon without breaking a sweat.
This is the right move for:
- Corporate training videos or legal depositions where every single word is critical.
- Broadcast television and film projects that have to meet strict industry accessibility standards.
- Anyone with a bigger budget who simply wants to hand the task off and know it will be done perfectly.
The trade-offs are pretty clear: cost and time. This is by far the most expensive route, typically billed by the minute of audio. And while it's faster than doing it yourself, you still have to wait for a human to do the work, which can often mean a 24-48 hour turnaround. It's an excellent, reliable option, but it's often overkill for the day-to-day needs of most creators.
Subtitle Creation Methods at a Glance
To make the choice a bit easier, here’s a quick breakdown of how these three methods stack up against each other.
| Method | Best For | Speed | Cost | Typical Accuracy |
|---|---|---|---|---|
| AI (Typist) | Daily content, social media, lectures | Minutes | Low | 99%+ |
| Manual | Short clips, artistic projects | Hours | Free (time) | User-dependent |
| Professional | Broadcast, legal, large budgets | 24-48 hours | High | 99.9%+ |
For the vast majority of people creating videos today, starting with an AI tool like Typist simply makes the most sense. It gives you the lightning speed of automation with the final control of a human touch.
Transcription that works in 99+ languages
Accurate results regardless of accent or language — just upload and go
How to Generate Subtitles Instantly with AI
If the idea of manually typing out every word of your video sounds like a nightmare, you’re in luck. There’s a much, much faster way. Using artificial intelligence to create subtitles has quickly moved from a cool concept to a practical, everyday tool for content creators. It can take what used to be hours of painstaking work and shrink it down to just a few minutes. Efficiency is the name of the game here.
Modern tools, like Typist, use advanced AI to listen to your video's audio and automatically convert it into a perfectly time-coded text file. You just upload your video, tell it what language is being spoken, and let the AI handle the rest. In a matter of minutes, you get a remarkably accurate first draft of your subtitles, complete with all the timestamps needed to sync the words to the screen. For anyone who needs to pump out content consistently, this is a total game-changer.
The Simple AI Subtitle Workflow
Getting started with an AI tool is incredibly simple. The whole process is designed to be user-friendly, so you don't need any technical skills to get a ready-to-use subtitle file.
Here's how it usually works:
- Upload Your Video: Just drag and drop your video file (like an MP4 or MOV) into the platform. Most services, including Typist, handle all the common video and audio formats.
- Select the Language: Pick the language spoken in your video from a dropdown list. The AI is smart enough to accurately transcribe dozens of languages and even handle different dialects.
- Start the Transcription: With one click, the AI gets to work. It listens to the audio, identifies every word, and assigns precise start and end times for each line.
- Review and Export: Once it’s done, you'll have a full, time-coded transcript. From there, you can quickly scan for any minor tweaks and then export it as an SRT file, which is the standard format for most video platforms.
This entire process is built for speed, freeing you up to focus on the more creative parts of your work while the AI handles the tedious stuff.
Why AI Is the Go-To Method Today
The explosion in AI subtitling isn't just a fleeting trend; it's a direct solution to the massive demand for accessible, captioned content. The technology is powered by huge leaps in automatic speech recognition (ASR), which has made these tools surprisingly reliable.
This infographic breaks down how the different methods for creating subtitles stack up in a real-world workflow.
As you can see, the AI path automates the most grueling steps, which is why it's so much faster. This shift is also driving huge growth in the industry. The global subtitle generator market is already valued at around $1.5 billion and is projected to grow by 18% annually through 2033, largely thanks to scalable and affordable AI solutions. You can discover more insights about this growing market to see why AI is quickly becoming the new standard.
Pro Tip: AI is incredibly accurate, but it's not perfect. It can sometimes get tripped up by unique names, acronyms, or niche industry jargon. I always recommend setting aside five minutes for a quick proofread to catch any small mistakes before you publish.
The tech that makes this all possible is pretty fascinating. If you're a bit of a nerd like me and want to peek behind the curtain, you can read about the engineering work involved in building the fastest AI audio transcription service.
For high-quality audio, the accuracy of tools like Typist now consistently hits over 99%, which is more than good enough for almost any project. It's also way better at handling different accents, background noise, and multiple speakers than older transcription tech ever was. When you combine that speed, low cost, and high accuracy, it’s easy to see why AI is the clear winner for most creators.
Start transcribing with Typist →
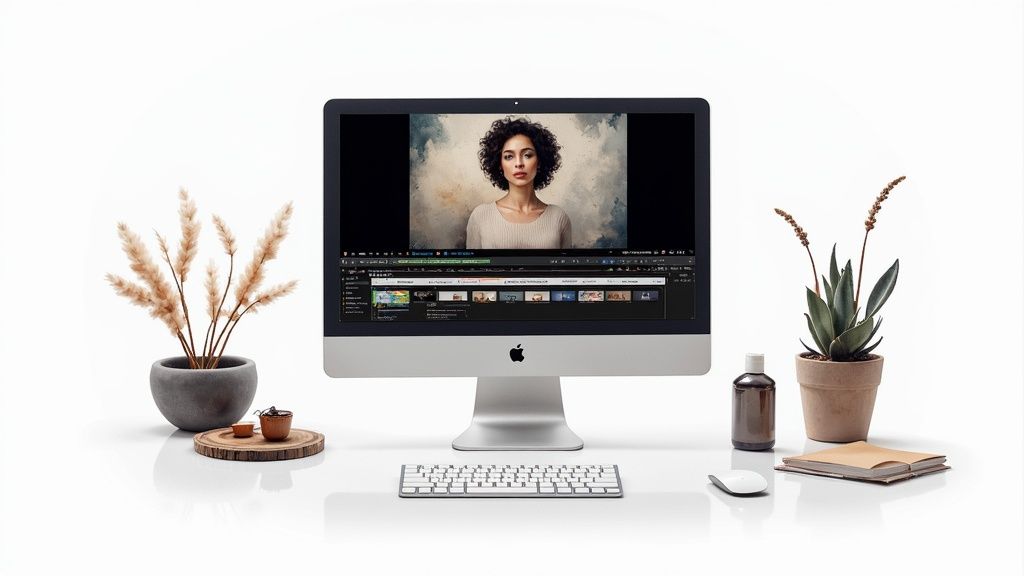
How to Edit and Perfect Your Subtitles
https://www.youtube.com/embed/OL9g61YIdyo
An AI-generated transcript is a fantastic starting point, but it's rarely perfect right out of the box. Think of it as a detailed first draft. A great tool like Typist gets you about 99% of the way there, saving you from the soul-crushing task of transcribing from scratch.
Your job is to handle that last 1%—the part that requires a human eye. This is where you clean up the text, fix the timing, and add the kind of nuance that makes subtitles feel completely natural.
Correcting Common AI Slip-Ups
Even the smartest AI can mishear things, especially when it comes to the messy reality of human speech. Your first pass should be a straightforward proofread to catch the most common goofs.
I've found that AI consistently stumbles in a few key areas:
- Proper Nouns: Is it "Sarah" or "Sara"? Did it hear "Canva" or "canvas"? AI often guesses on unique names of people, brands, or places, so double-check these.
- Technical Jargon: If you're discussing "mitochondrial DNA" or "quantitative easing," there's a good chance the AI will spit out a phonetic guess. Make sure your expert terminology is accurate.
- Homophones: Words like "their," "there," and "they're" are classic AI traps. The same goes for "your" and "you're." Only a human can catch these context-based errors.
My best tip? Play the video while you read through the transcript. Hearing the audio makes it so much easier to spot where the text doesn't quite match what was actually said.
Formatting for Readability
Once the words are right, it's time to make them easy to read. How you break up lines of text on the screen can make or break the viewing experience. Clunky, long subtitles are distracting and just feel unprofessional.
The goal is to make the subtitles almost invisible. Your audience should be absorbing the content, not consciously reading it.
To get there, focus on two simple things: line length and line breaks.
As a rule of thumb, stick to a maximum of two lines per subtitle and keep each line under 42 characters. This stops a giant wall of text from cluttering the screen and gives people enough time to read without feeling rushed. Break longer sentences into shorter, more natural phrases that mirror the speaker's cadence.
For instance, the AI might give you one long block like this:
00:00:15,200 --> 00:00:19,800
So today we're going to be talking about how to create subtitles for videos which is a really important skill for any modern content creator to have.
With a quick edit, you can make it far more digestible:
00:00:15,200 --> 00:00:17,900
Today we're talking about how to create subtitles for videos.
00:00:18,000 --> 00:00:19,800
It's a really important skill for any creator.
See the difference? It’s cleaner and much easier to follow.
Syncing Timestamps and Adding Sound Cues
Timing is everything. Subtitles need to appear precisely when a person starts talking and disappear as soon as they finish. If they lag behind or jump ahead, it’s incredibly jarring for the viewer.
Most editors, including the one built into Typist, have a visual timeline that makes this easy. You can just drag the start and end points of each subtitle block until the timing feels perfect.
Finally, don't forget to add non-verbal cues. These are descriptions of important sounds, usually in brackets, that provide crucial context for viewers who are deaf or hard of hearing.
- [laughs]
- [upbeat music]
- [phone rings]
- [door slams]
These small details help paint the full picture of what's happening on screen. Taking a few extra minutes to get the timing and these cues right is what separates good subtitles from great ones, making your content accessible and professional for everyone.
Getting Your Subtitles onto the Video
Three free transcriptions. No credit card. Get started
You've done the hard work of editing the transcript and nailing the timing. Now for the final, crucial part: getting those subtitles out of your editor and onto your video so the world can see them.
This last step is all about packaging your work into a format that video players and social media platforms can actually understand. Thankfully, it's pretty straightforward once you know your options.
The file format you'll work with 99% of the time is the SubRip Subtitle file, better known by its .srt extension. It’s the undisputed industry standard for a reason. It’s simple, text-based, and works with just about every video player and platform you can think of, from YouTube to Adobe Premiere Pro.
What Exactly Is an SRT File?
Don't let the technical name fool you; an SRT file is surprisingly simple. It’s just a plain text file that methodically lays out four key pieces of information for every single line of dialogue.
- A simple number to keep the subtitles in order (1, 2, 3...).
- The start and end times, formatted down to the millisecond (
00:02:15,500 --> 00:02:17,300). This tells the player precisely when to show and hide the text. - The subtitle text itself—the actual words that will appear on the screen.
- A blank line to signal the end of one subtitle and the beginning of the next.
When you use a tool like Typist, exporting this file is as easy as clicking a button. Once your transcript is looking good, you just hit "Export," choose the SRT format, and you're done. The software handles all the complex formatting for you, spitting out a perfect, ready-to-use file in seconds.
And this isn't just a niche skill for social media. The global captioning and subtitling market is projected to reach an incredible USD 644.7 million by 2033, growing at a 7.7% annual clip. This boom is driven by huge demand from educational institutions and corporate training, proving that accessible, subtitled content is becoming a fundamental part of communication everywhere.
Hardsubs vs. Softsubs: Which One Is Right for You?
With your shiny new SRT file in hand, you have a big decision to make. Do you "burn" the subtitles permanently into the video, or upload them as a separate file that viewers can turn on and off? The right choice really depends on where your video is going and what kind of experience you want to create.
Softsubs: The Flexible Choice
Softsubs are what you get when you upload your SRT file alongside your video on platforms like YouTube, Vimeo, or LinkedIn. The subtitles aren't actually part of the video frames; they exist as a separate text layer that viewers can toggle on or off with the [CC] button.
For most online video, this is the way to go. It offers some huge advantages:
- Accessibility: Viewers are in control. They can turn captions on if they're hard of hearing, in a loud environment, or just prefer to read along.
- SEO Boost: Search engines can read the text in your SRT file. This helps them understand your video's content, which can seriously improve its ranking in search results.
- Multi-Language Support: You can upload multiple SRT files for different languages, letting a global audience choose the one they need.
Hardsubs: The Permanent Option
Hardsubs (or "burned-in" subtitles) are the exact opposite. The text is permanently stamped onto the video image itself and can never be turned off. You would typically do this in a video editor, where you place the text on the video track before exporting the final MP4 file.
My Two Cents: Go with hardsubs when you absolutely must ensure the captions are seen. This is the go-to method for social media clips on Instagram or TikTok, where videos often autoplay on mute and you have just seconds to grab someone's attention.
If you’re creating content for Instagram, this guide on how to add captions to Instagram Story can walk you through the specifics. But for longer videos on platforms like YouTube, softsubs almost always provide a better, more flexible experience for your viewers.
Answering Your Top Questions About Subtitles
Getting into subtitling can feel like learning a new language. You'll hear a lot of new terms and run into questions about formats and best practices. It's a pretty simple process once you get the hang of it, but knowing a few key details can make a world of difference in your workflow.
Let's clear up some of the most common questions creators ask. Getting these answers right from the start will help you make subtitles that look professional and actually help your audience.
What’s the Real Difference Between Subtitles and Captions?
This is, without a doubt, the number one point of confusion. People throw these terms around interchangeably, but they are absolutely not the same thing. Knowing which one you need is crucial for serving your audience correctly.
- Subtitles are for people who can hear the audio but don't speak the language. Think of watching a foreign film. Their only job is to translate the spoken dialogue.
- Closed Captions (CC) are for viewers who are deaf or hard of hearing. They cover all the important audio, not just the dialogue. This includes critical sound effects like [door slams], [phone rings], or even descriptions of the music like [upbeat music].
To really nail this down, it helps to understand the definition of a subtitle and its specific role. Honestly, if you want to make your content as accessible as possible, just go with closed captions. They work for everyone—both those who need translation and those who need audio descriptions.
What's the Best Format for Video Subtitles?
You'll see a few different file types out there, but let me save you some time: SRT (.srt) is the one you want.
SRT, short for SubRip Subtitle, is a plain text file that just works everywhere. Seriously. YouTube, Vimeo, Facebook, Adobe Premiere Pro, you name it—they all support it. It's the industry standard for a reason.
An SRT file is incredibly simple. Each subtitle entry has just three parts:
- A number to keep things in order.
- The exact time the subtitle should appear and disappear.
- The actual text you want to show on screen.
That's it. This simplicity is its biggest advantage. You can even open it in Notepad or TextEdit to make quick changes. When you use a tool like Typist to create your subtitles, the SRT format is your most reliable, no-fuss option.
Upload MP3, WAV, MP4 or any media file — get accurate text back instantly Upload a file
How Long Should a Subtitle Line Be?
If people can't read your subtitles before they disappear, you've failed. The entire point is readability. The goal is to find that perfect balance where you give enough context without covering up your video or overwhelming the viewer.
The bottom line: Your subtitles are there to support the video, not become the main event. Keep them short, sweet, and easy to read.
Here are the rules of thumb I always follow, and they're pretty much the industry standard:
- Stick to Two Lines (Max): Never, ever go over two lines of text at once. If you can say it in one, even better.
- Keep Characters in Check: Aim for no more than 42 characters per line. This stops the text from stretching awkwardly across the screen and makes it much faster to scan.
The trick is to break up longer sentences. For example, don't cram this into one subtitle: "Today, we are going to explore the complex history of video subtitles and why they are so critical for accessibility."
Instead, split it into two sequential chunks.
First subtitle:
Today, we are going to explore
the complex history of video subtitles...
Second subtitle:
...and why they are so critical
for accessibility.
This small adjustment makes a massive difference in the viewing experience. It respects your audience's reading pace and keeps their eyes on your content. Getting these details right is a huge part of learning how to create subtitles for videos that feel polished and professional.