How to Add Captions to Videos The Easy Way
Learn how to add captions to videos for better engagement and accessibility. This guide shows you the fastest way using AI, from transcript to SRT.
Adding captions to your videos used to be a real chore. You had to generate a transcript, painstakingly format it with timestamps into something like an .SRT file, and then upload it. Thankfully, modern tools like Typist have completely changed the game. It handles the heavy lifting, turning your video's audio into a highly accurate transcript you can edit and export with a single click. This makes your content way more accessible and engaging for your audience.
Why Video Captions Are a Game-Changer for Growth
You pour a ton of effort into your videos—getting the quality, storytelling, and visuals just right. But what if one of the most powerful tools for success is something most creators still treat as an afterthought? Captions have evolved from a simple accessibility feature into an absolute must-have for any serious video strategy.
Just think about how people watch videos these days. They might be trying to catch your latest marketing clip on a loud train, scrolling through their feed in a quiet doctor's office, or trying to absorb a complex tutorial without bugging their roommate. In every single one of these situations, captions are what connect your message to the viewer. Without them, your video is just moving pictures, and you've likely lost them.
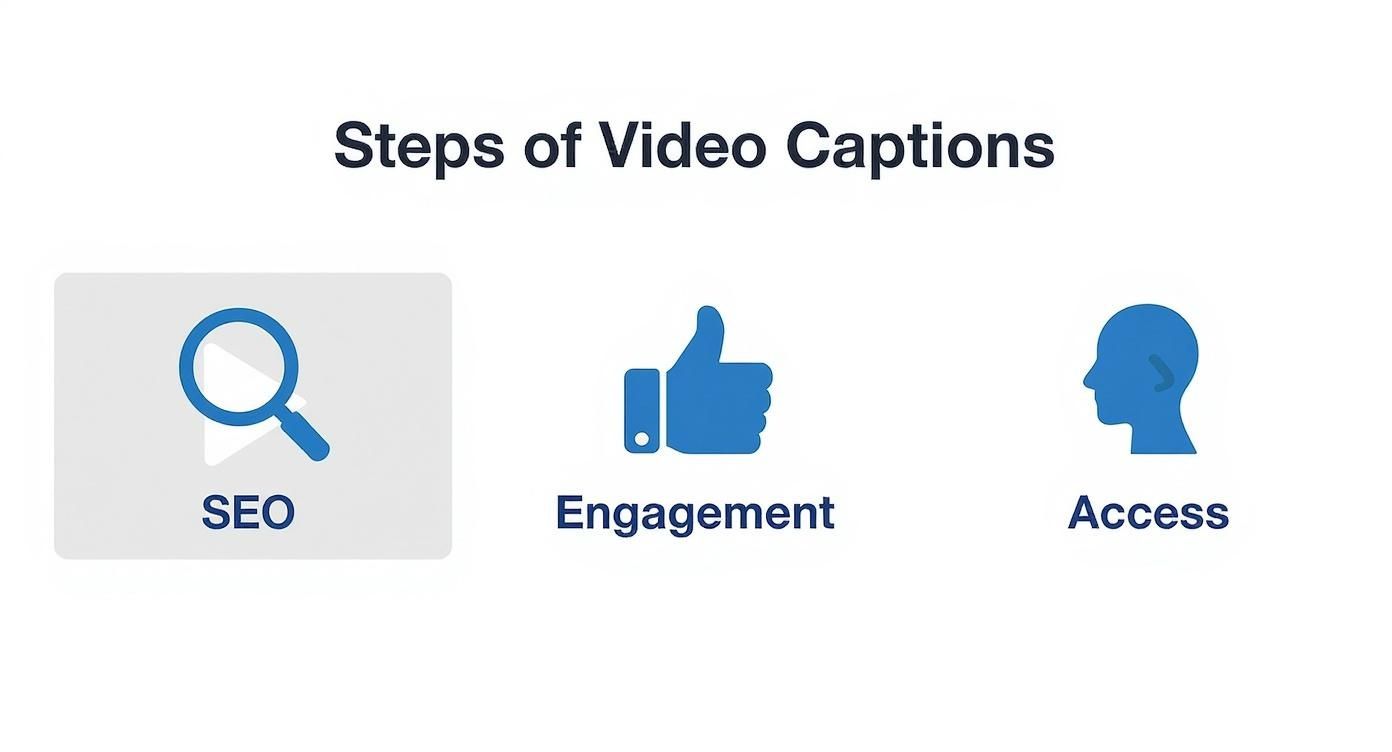
Boost Your Reach and Engagement
Captions aren't just for silent viewing; they directly impact the metrics that matter most to creators and marketers.
- Better SEO: Search engines can't watch videos, but they can read text. Your caption file acts as a full transcript packed with keywords, helping search engines understand your content and rank it higher.
- Longer Watch Time: When people can read along, they tend to stick around longer. This is a huge signal to platforms like YouTube, which often reward videos with higher retention by showing them to more people.
- Clearer Understanding: Captions reinforce what you're saying, making complex topics easier to digest and remember. This is especially helpful if you're explaining something technical or if viewers aren't native speakers.
To put it simply, adding captions is one of the easiest ways to improve your video's performance across the board.
Here's a quick look at why this is such a crucial step:
| Benefit | Impact on Your Content |
|---|---|
| Increased Accessibility | Opens your videos to millions of viewers who are Deaf or hard of hearing. |
| Improved SEO | Gives search engines a text-based version of your video to crawl and rank. |
| Higher Engagement | Captures attention in sound-off environments, boosting watch time. |
| Enhanced Comprehension | Reinforces your message, making it easier for everyone to understand and retain. |
Captioning is no longer a "nice-to-have"—it's a core part of creating effective, inclusive, and high-performing video content.
Make Your Content Accessible to Everyone
Beyond just the performance boosts, captions are about being inclusive. They open up your content to the 48 million Americans who are Deaf or hard of hearing, ensuring your message can reach them.
This isn't just about doing the right thing; it’s a smart business move. The demand for accessible content is skyrocketing, and the video captioning service market is expected to hit USD 3.8 billion by 2032. As audience expectations and even regulations continue to shift, captioning is quickly becoming non-negotiable.
Tools like Typist make this so easy, turning what used to be a technical headache into a quick, strategic win. When you add captions, you’re not just putting words on a screen. You’re reaching a bigger audience, climbing the search rankings, and making sure your message truly connects with everyone.
Transcribe a 1-hour recording in under 30 seconds
Upload any audio or video file and get a full transcript with timestamps
Getting Your Transcript Done in Minutes with Typist
Okay, so we know why captions are a big deal. Now, let's get to the how. This used to be the part everyone dreaded—the soul-crushing, time-sucking task of typing out every single word. I've been there. It's awful. But thankfully, today's AI tools have completely flipped the script, making this a job you can knock out in a few minutes.
I’ll walk you through how it works with a tool like Typist, using a real-world example. Imagine you just finished a 10-minute product demo video. The old way would mean blocking out at least an hour to transcribe it. The new way? You just upload the file and let the AI handle it.
A Simple Upload and Go
The whole process is designed to be ridiculously easy. You kick things off by just dragging and dropping your video file (like an MP4 or MOV) right into the dashboard.
This is what you’ll see. Clean, simple, and no messing around.
There’s no complicated setup or a dozen buttons to figure out. It’s all about getting your video transcribed, fast.
Once it's uploaded, Typist's AI engine fires up. It rips through the audio, turning all the spoken words into text at an incredible pace. I’ve found it’s surprisingly good at handling tricky stuff like industry jargon or different accents, which is a huge plus for accuracy. If you're curious about the tech that makes this so fast, the team wrote a great piece on building the fastest AI audio transcription.
From Raw Text to Polished Captions
In just a couple of minutes, your entire 10-minute video is transcribed and sitting there, ready for you to review. This speed is what makes modern captioning so powerful. It removes all the friction that used to make creators put this task off until the last minute (or skip it altogether).
This efficiency isn't just about saving time; it directly fuels the core benefits you're after. Faster transcription is the starting point for better SEO, higher engagement, and making your content accessible to everyone.
The real win here is freeing up your time. Instead of getting bogged down in manual transcription, you can focus on refining your message and actually connecting with your audience. The goal isn't just to slap words on a screen—it's to make your content work harder for you.
Tools like Typist let anyone, not just big production houses, add professional captions to their content without breaking a sweat or the bank. The core benefit is the same: turning your audio into text almost instantly, so you can get on with the important stuff.
Refining Your Captions for Professional Accuracy
Transcription that works in 99+ languages
Accurate results regardless of accent or language — just upload and go
An AI transcript gets you about 99% of the way there, which is a fantastic start. But that last 1%? That’s where the magic happens. This is your chance to give the captions a final polish inside the Typist editor, turning a solid draft into a flawless final product that truly represents your brand.
Think about it: an AI might not know the unique spelling of a company like "Klaviyo" or recognize a niche acronym like "SaaS." Getting these details right is what builds credibility with your audience.

Spending just a few minutes on a quick review can make all the difference.
Making Quick and Easy Edits
The Typist editor is designed to be fast and intuitive. As you review the text, the audio plays along, so you can hear the words as you read them. This makes it incredibly easy to catch any little mistakes.
I find that most of my edits fall into a few common buckets:
- Proper Nouns and Names: AI often struggles with unique names of people, brands, or products. A quick once-over to correct these is a must.
- Industry Jargon: If your content is technical, the AI might misinterpret specialized terms. Fixing these shows your expert audience that you know what you're talking about.
- Homophones: Words that sound alike but are spelled differently (like "their," "there," and "they're") can sometimes trip up even the best AI.
Smart Tools for Faster Polishing
To make this process even faster, Typist has some handy tools built right in. For example, if you spot a recurring mistake—like a misspelled name that pops up multiple times—you can use the find-and-replace feature to fix every single instance in one go.
It's a massive time-saver compared to tracking down each one manually.
The goal here isn't just about fixing typos. It's about making sure the captions perfectly match your tone and style. This final human touch elevates your video from just "having captions" to being professionally presented and easy to consume.
This step is your final quality check. Investing a few moments here guarantees your viewers have a smooth experience, reinforcing your brand's commitment to quality and attention to detail.
Try Typist free - Get 3 transcripts daily
Getting Your Captions Out in the Right Format
Alright, you've put in the work and polished your transcript until it shines. Now what? The next step is getting that text out of Typist and into a format that video players and social media platforms can actually use. This might sound a bit technical, but trust me, it’s a lot simpler than it seems.
We’re going to focus on the one format that works almost everywhere, so you won’t have to worry about compatibility issues down the road.

This is the moment your plain text transcript becomes a dynamic caption file, ready to be paired with your video.
Meet the SRT File: Your New Best Friend
When it comes to captions, the undisputed champion is the SubRip Subtitle file, or as you'll always see it, the SRT (.srt) file.
Think of an SRT file as a simple text document with a special job. It contains all your transcribed text, but it's broken down into small, digestible chunks. Each one of those chunks is tagged with a precise start and end time, telling the video player exactly when to display a specific line of text and when to take it away.
It’s this simple, powerful structure that makes the SRT format so universally loved. Whether you’re uploading to YouTube, Vimeo, Facebook, or even dropping it into a professional editing software, they all understand SRT. It just works.
An SRT file is basically the bridge between your static transcript and a dynamic, synchronized viewing experience. Its simplicity is what makes it the industry standard—no fuss, no frills, just perfect timing.
There are other formats out there, sure, but sticking with SRT means you have one reliable file that will work pretty much anywhere. That saves a ton of headaches.
Upload MP4 or MOV, export SRT subtitles. Works with Premiere, Final Cut, DaVinci Try it free
Exporting Your SRT File from Typist
Typist makes this part incredibly easy—it’s literally a one-click process.
Once you’re satisfied with your edited transcript, just find the export options and choose "SRT." That's it. Typist does all the heavy lifting in the background, formatting your text and timings into a clean, perfectly structured file.
You don't have to worry about getting the timestamp syntax right or messing with formatting rules. You just get a file that's ready to go. Some tools might give you options to tweak things like how many lines appear in each caption block, but the default settings are usually good to go for optimal readability.
While SRT is your go-to for web video, you might bump into a few other file types. Here’s a quick rundown of the most common ones.
Common Caption File Formats
| Format | Best For | Key Feature |
|---|---|---|
| SRT (.srt) | Virtually all online video platforms (YouTube, Vimeo, social media) | Simple text-based format with timestamps, ensuring maximum compatibility. |
| VTT (.vtt) | Web videos using HTML5; an evolution of SRT | Supports more advanced styling options like text color and positioning. |
| TXT (.txt) | Creating a simple, readable document of the transcript | Plain text with no timecodes; useful for articles or show notes. |
As you can see, each has its place, but for the purpose of adding captions to videos online, SRT is the one you’ll use 99% of the time.
With your SRT file downloaded from Typist, you're officially on the home stretch. You now have a universal caption file ready to be uploaded to any video platform, making your content more accessible and engaging for everyone.
You’ve done the hard work in Typist and now have a perfect SRT file ready to go. This is the fun part—getting those captions onto your video and out into the world.
While every platform has its own quirks, the basic idea is always the same. You just need to find the "Subtitles" or "Captions" section for your video and upload the file you just created.
It might seem like a small final step, but it’s what makes all the effort worth it. You’re instantly making your video more accessible and engaging. The demand for captions is absolutely exploding; the global market is on track to hit a staggering USD 3.8 billion by 2032. This isn't just a niche trend—it's a clear signal that both audiences and platforms are prioritizing accessible content. You can read the full research about the expanding captioning market to see just how big this shift is.
Let’s get your file uploaded. Here’s a quick walkthrough for the major players.
Adding Captions on YouTube
YouTube has this down to a science. Their system is clean, simple, and gets the job done fast.
Once you’re in your YouTube Studio:
- Head over to the Content tab on the left and click on the video you’re working on.
- In the video details, find and select Subtitles from the left-hand menu.
- Click ADD LANGUAGE and pick the language that matches your captions.
- You'll see a new row for that language appear. Under the Subtitles column, click ADD.
- A new screen will pop up. Choose the Upload file option.
- Make sure you select With timing—your SRT file already has all that info—then hit CONTINUE.
- Just find your .srt file on your computer, upload it, and you're all set! YouTube will do the rest.
Uploading SRT Files to Vimeo
Vimeo's process is just as straightforward, helping you maintain that professional polish the platform is known for.
From your Vimeo account:
- Go to your video library and open the video that needs captions.
- On the video's management page, look for the Captions and audio option in the left sidebar.
- Click the “+” button, select your language, and choose "File" as the upload type.
- Click Choose file and grab the SRT you exported from Typist.
- Once it's uploaded, just flick the little toggle switch to make your captions live.
Try Typist free - Get 3 transcripts daily
Integrating Captions on Social Media
This is a big one. So many people watch videos on platforms like Facebook and LinkedIn with the sound off, so captions are non-negotiable.
For Facebook: When you’re uploading a new video, keep an eye out for the Video Options button. This opens up an editing panel where you’ll find a Captions section. You can upload your SRT file right there. If your video is already posted, no worries—just edit the post, and you'll find the same option.
For LinkedIn:
After you’ve selected your video to post, look for Video settings in the top right of the preview window. You’ll see a Select file button to upload your SRT. One important quirk with LinkedIn: they require a specific file name format. It has to be [Your Filename].[language code]_[country code].srt. So, for a video with American English captions, it would look like MyAwesomeVideo.en_US.srt.
Taking those few extra moments to upload your SRT file ensures your message lands, no matter how someone is watching. It’s a tiny action that has a massive impact on your content's reach and professionalism.
Common Questions About Video Captions
Even with a great tool in your corner, a few questions always pop up when you're getting the hang of adding captions to videos. That's completely normal. Let’s walk through some of the most common ones I hear, so you can get your captions looking professional from the get-go.
Think of this as clearing up those last little uncertainties, whether they're about style choices or tricky technical spots.
How Long Should Caption Lines Be?
This is a big one. You want people to actually read the captions, not just see a wall of text flash on the screen.
A solid rule of thumb is to keep your captions to a maximum of two lines at any given time. For the length of each line, try to stick to 42 characters or less. This keeps the text from hogging the screen and gives your audience enough time to read and process what's being said without falling behind. Thankfully, good tools like Typist take care of this formatting for you when you export your SRT file.
Turn podcast episodes into blog posts Start transcribing
Can I Change How My Captions Look?
You can, but where you do it matters. The SRT file itself is just plain text with timestamps; it doesn't carry any styling information like fonts or colors. The magic happens on the platform where you upload your video.
- YouTube: Viewers have a ton of control. They can change the font, color, size, and even the background of the captions to suit their needs.
- Vimeo: Also offers great customization options, which is perfect for keeping your captions consistent with your brand's look and feel.
- Video Editors: If you're using software like Adobe Premiere Pro, you can "burn in" the captions. This means they become a permanent part of the video, giving you total control over how they look.
For most content you put on the web, just letting the platform handle the styling is your best bet. It's what users are used to.
What If My Captions Are Out of Sync?
Nothing is more distracting than captions that are ahead or behind the speaker. If you're running into this, the problem is almost always in the SRT file's timestamps. This often happens if the video was edited after the transcription was created.
The cleanest fix is to simply re-transcribe the final, locked version of your video. Using Typist on the finished edit will generate a brand new SRT file that’s perfectly synced. If you only need to make a tiny tweak, some video players and editing software let you "nudge" the timing of all your captions forward or backward.
Key Takeaway: Always, always transcribe the final cut of your video. This one simple habit will save you from almost every sync-related headache down the road.
If you ever run into a really tricky situation or have a complex project, don't hesitate to ask for help. You can always get in touch with the Typist team to sort out any unique challenges.